13 Brick Edging Ideas for Neat Garden Borders

Brick edging gives lawns, flower beds, paths, and driveways a cleaner finish while keeping soil and mulch in place. These brick edging ideas cover flat borders, raised designs, curved layouts, and decorative patterns.
You can recreate many of them with reclaimed bricks, making this an attractive and budget-friendly garden project.
1. Driveway Brick Edging
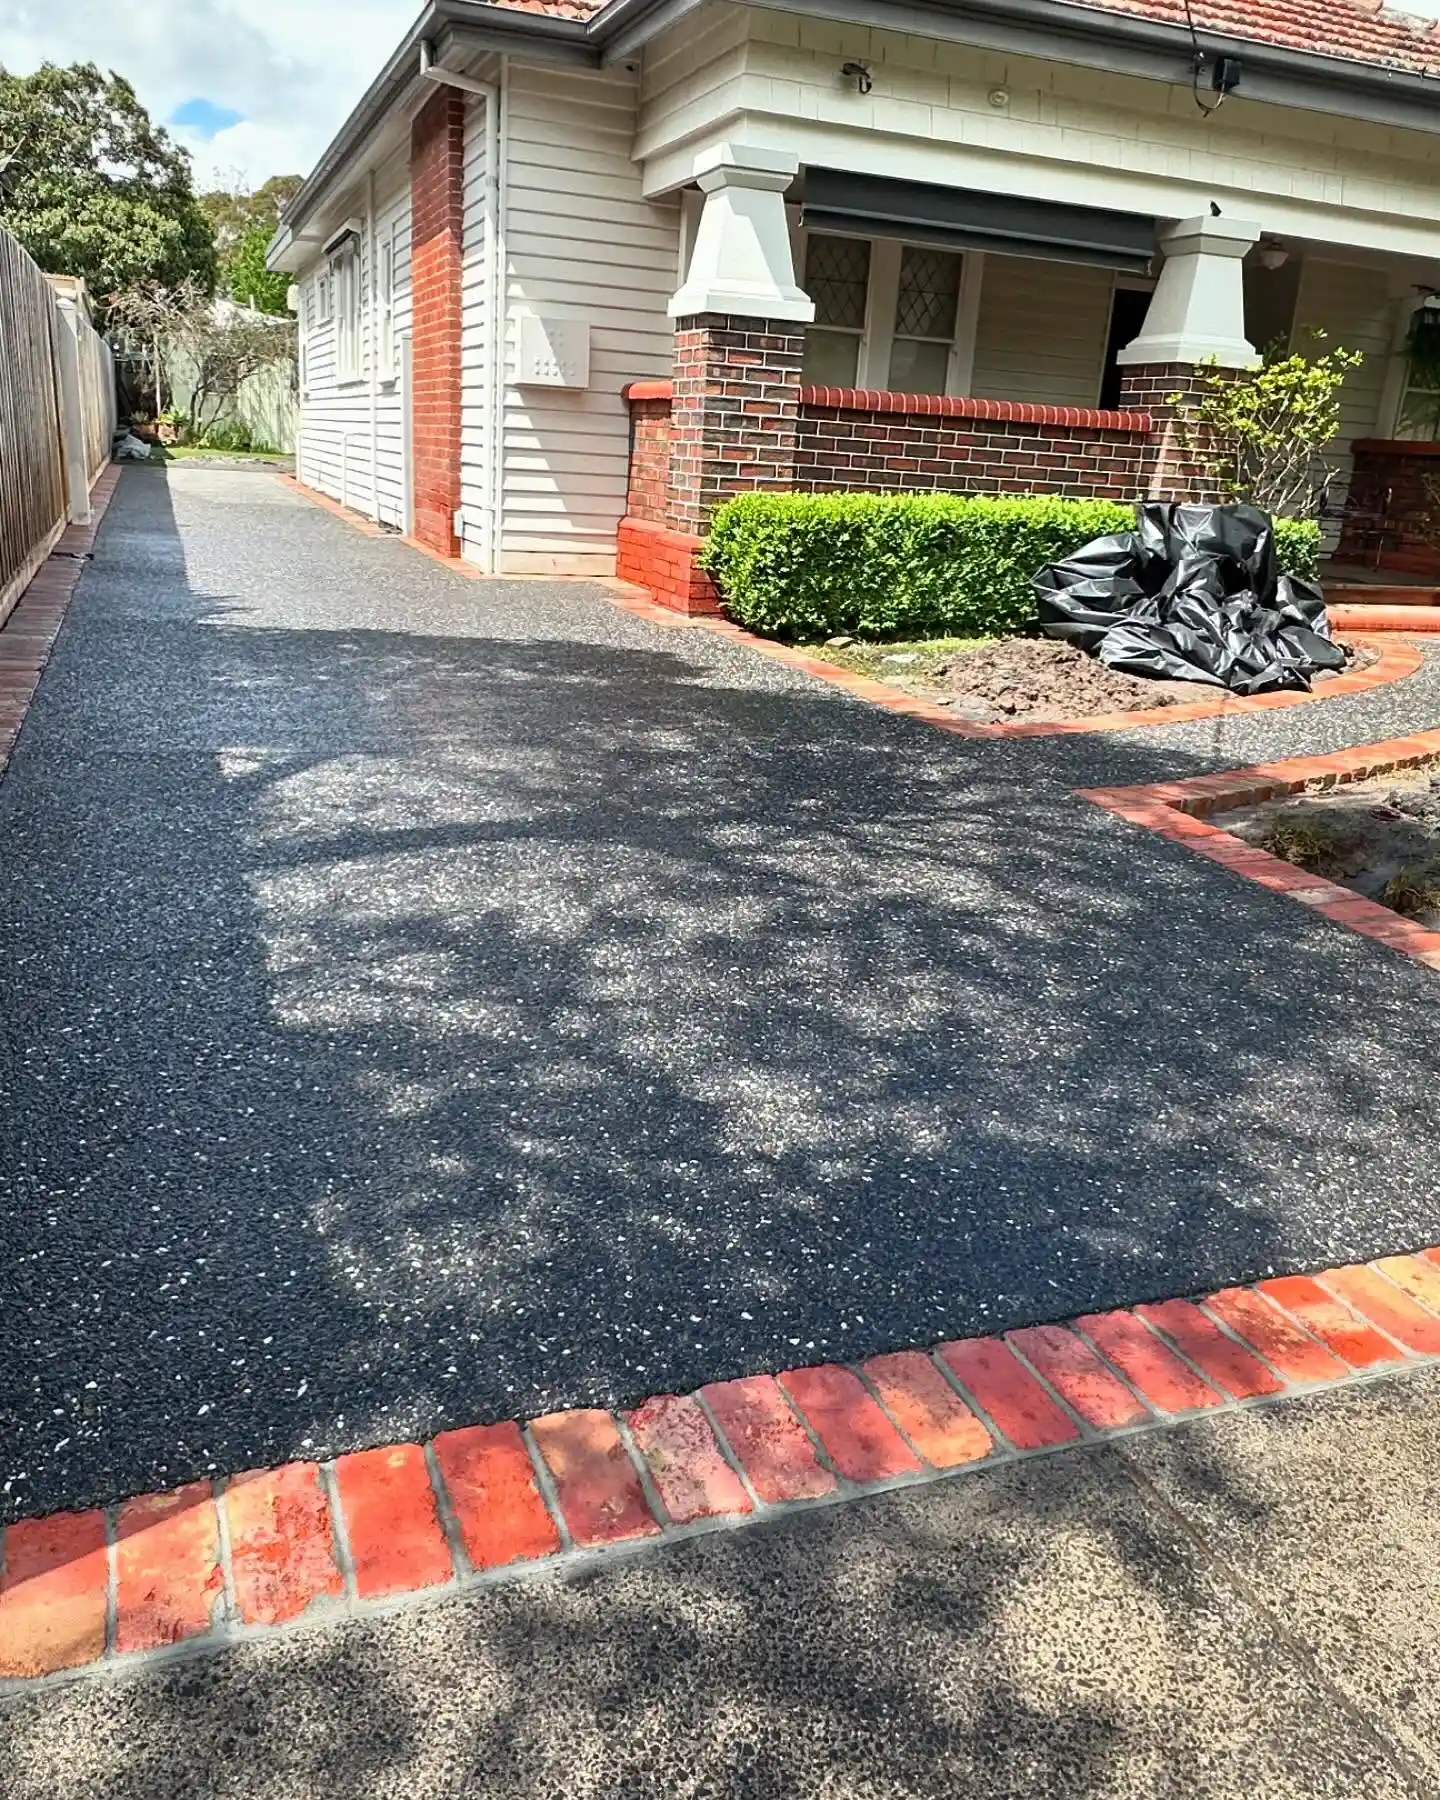
A single row of red bricks creates a crisp break between the dark asphalt driveway and the surrounding garden. The warm brick also ties the driveway to the home’s red exterior details. We like this layout because it makes a practical surface feel more connected to the overall property.
- Set the bricks on compacted gravel to prevent sinking.
- Keep the brick tops level with the driveway surface.
- Use a string line to maintain a straight border.
- Choose solid clay bricks rated for outdoor use.
- Fill narrow gaps with polymeric sand to reduce weeds.
2. Sawtooth Brick Edging
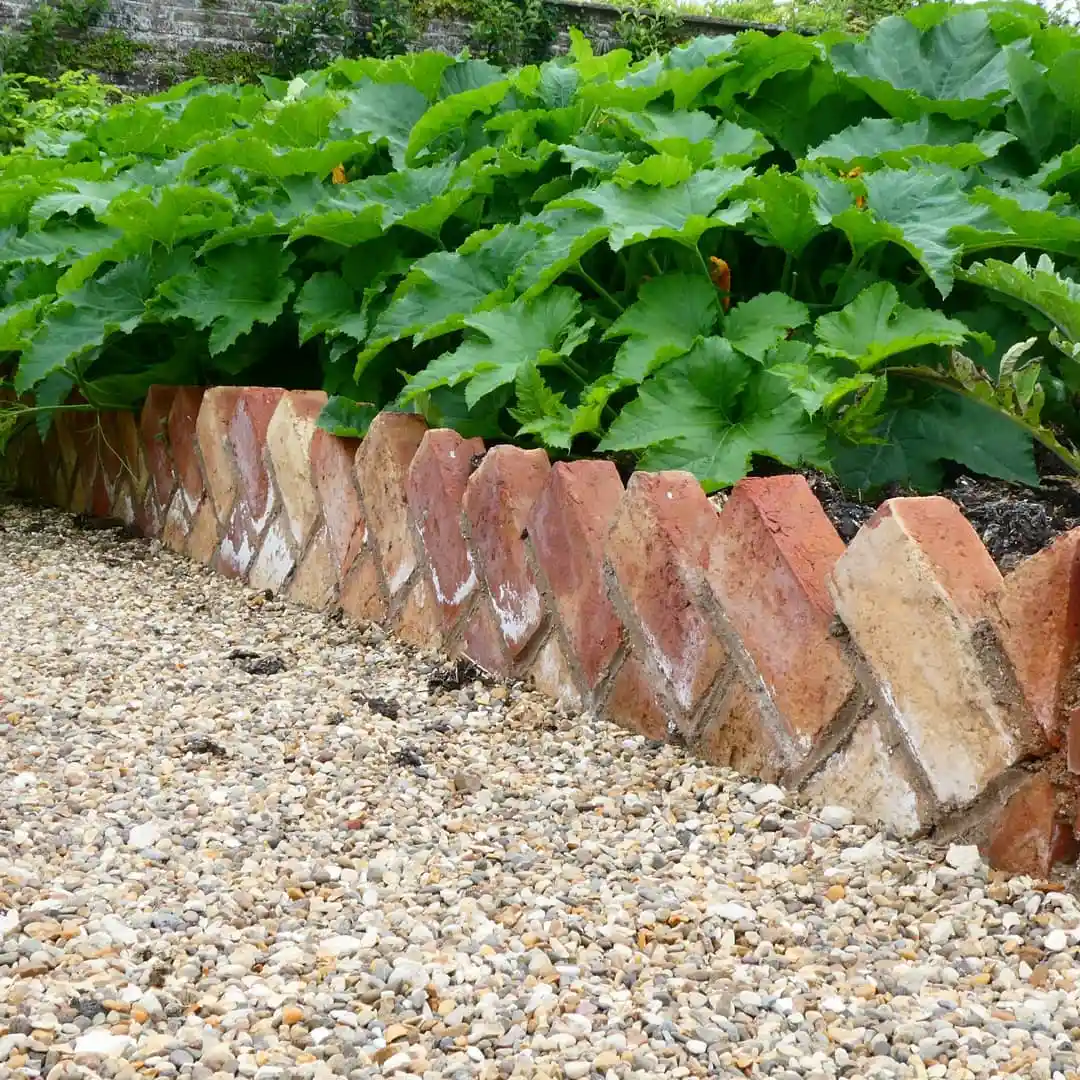
Bricks installed diagonally create a sawtooth border with plenty of cottage-garden character. The raised points separate the leafy planting bed from the pale gravel path while adding texture. This style works especially well with reclaimed bricks because worn edges and mixed colors make the pattern feel naturally aged.
- Dig a trench deep enough to support each angled brick.
- Keep the exposed points at a consistent height.
- Pack soil firmly on both sides of the border.
- Use older bricks for a softer, rustic finish.
- Avoid this design beside areas where children frequently play.
3. Flush Lawn Brick Edging
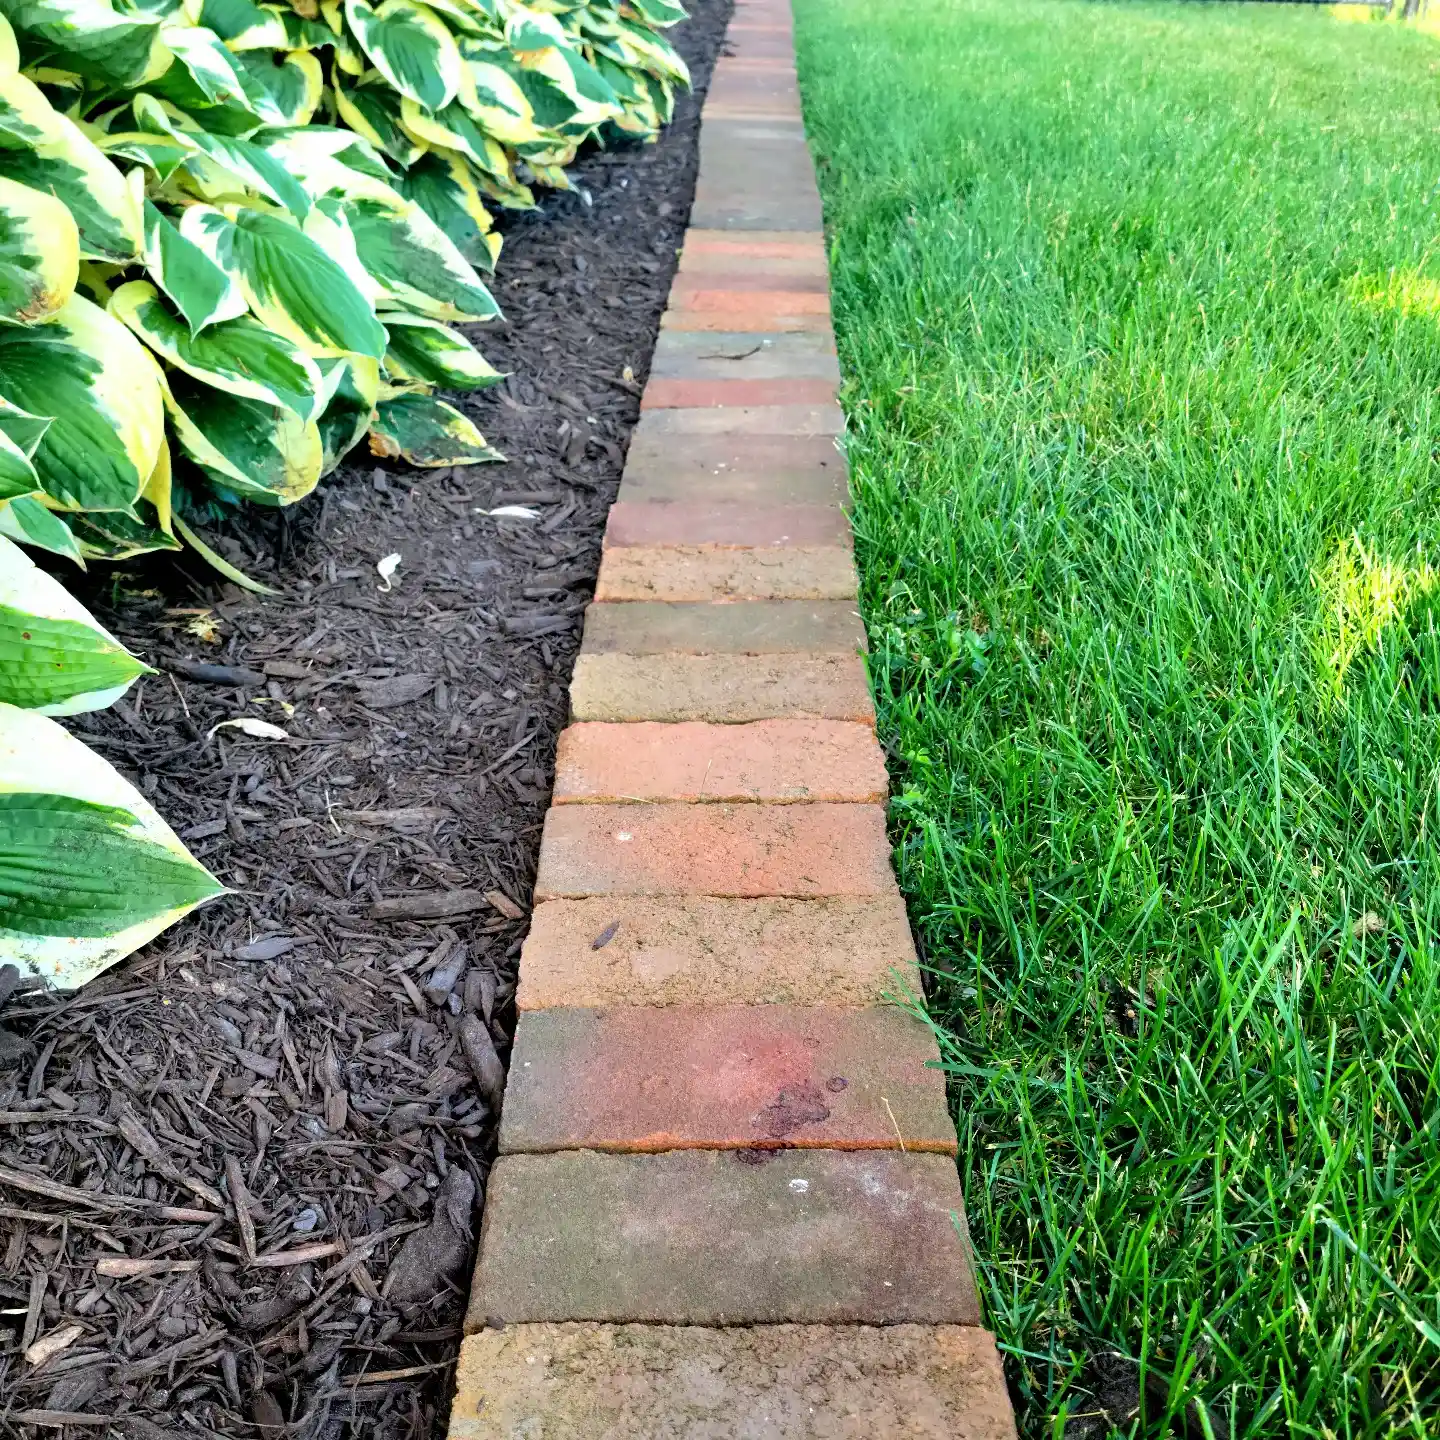
This simple brick edging sits almost level with the lawn, creating a tidy line between grass and dark mulch. Its flat surface allows mower wheels to pass over the bricks, reducing the need for extra trimming. Mixed red and brown tones look relaxed beside the broad green hosta leaves.
- Place bricks on two to three inches of compacted sand.
- Set the border slightly above the surrounding soil.
- Check the level every few bricks during installation.
- Leave enough room between the bricks and plant crowns.
- Sweep sand into the joints for a firmer finish.
More Ideas:-
- 20 Best Paver Walkway Ideas
- 25 Easy Front Yard Landscaping Ideas Anyone Can Copy
- 25 No Grass Backyard Ideas for a Low-Maintenance Yard
- 44 Backyard Landscaping Ideas That Make Your Yard Look Expensive
4. Painted Black Brick Edging
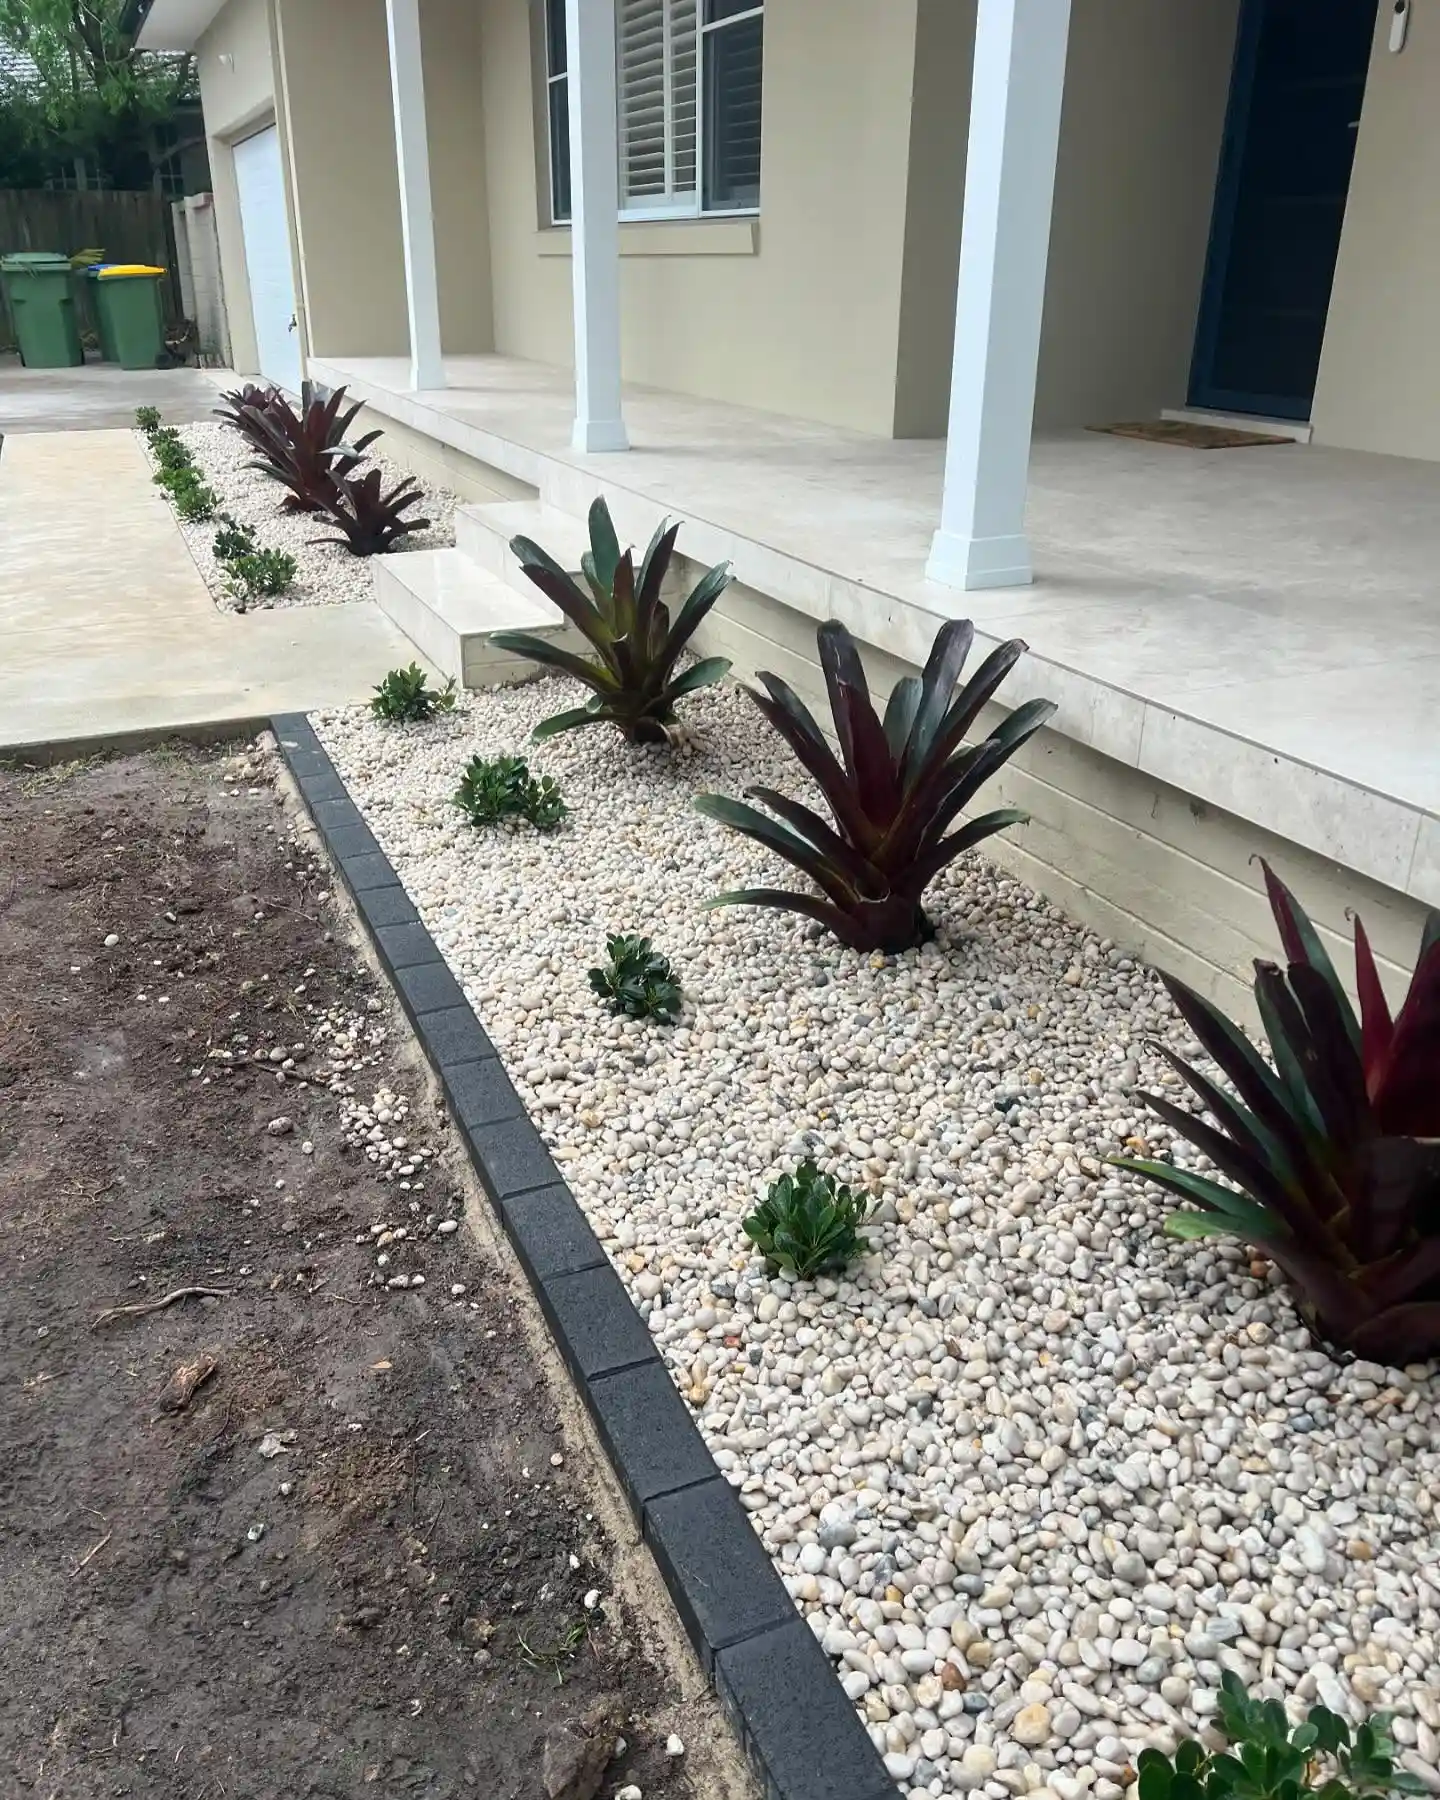
Painting old bricks charcoal black gives this narrow foundation garden a smart, modern border. The dark edge frames the white stones and burgundy plants without competing for attention. It is also a useful way to reuse mismatched bricks that would look uneven if their original colors remained visible.
- Clean dirt and moss from the bricks before painting.
- Use masonry paint made for outdoor surfaces.
- Apply two thin coats for more even coverage.
- Let the bricks dry fully before placing them.
- Keep leftover paint for chips and seasonal touch-ups.
5. Raised Brick Bed Edging
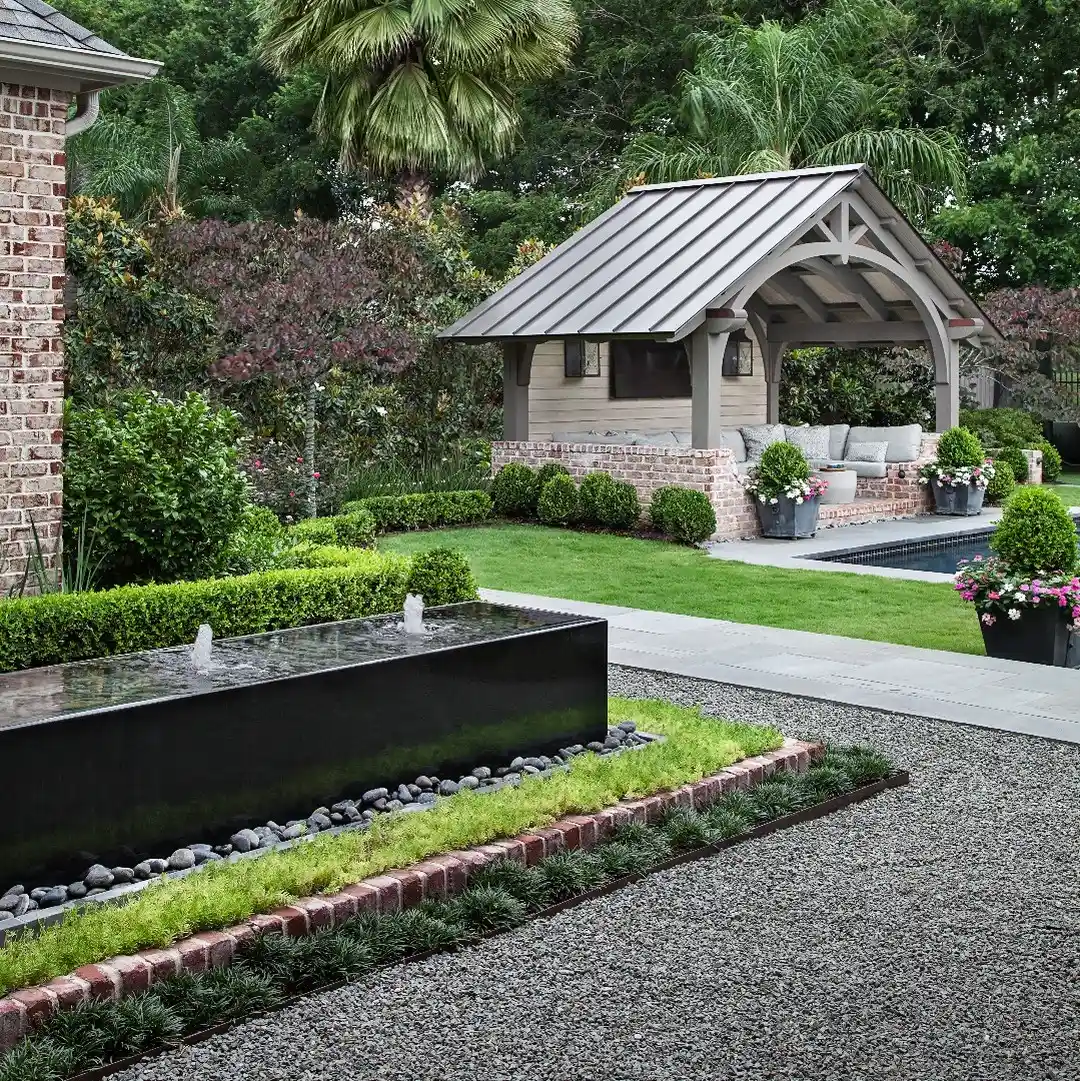
A low row of raised bricks outlines the long planting bed surrounding this modern water feature. The weathered red tones soften the dark gravel, clipped greenery, and straight concrete paths. Because the border sits above ground, it also helps stop loose stones and soil from shifting into nearby areas.
- Install bricks on a firm and level trench base.
- Keep the finished height low enough to step over safely.
- Follow the bed’s shape before fixing bricks permanently.
- Use mortar if the border may receive regular foot traffic.
- Repeat the same brick elsewhere for a connected garden design.
6. Curved Driveway Brick Edging
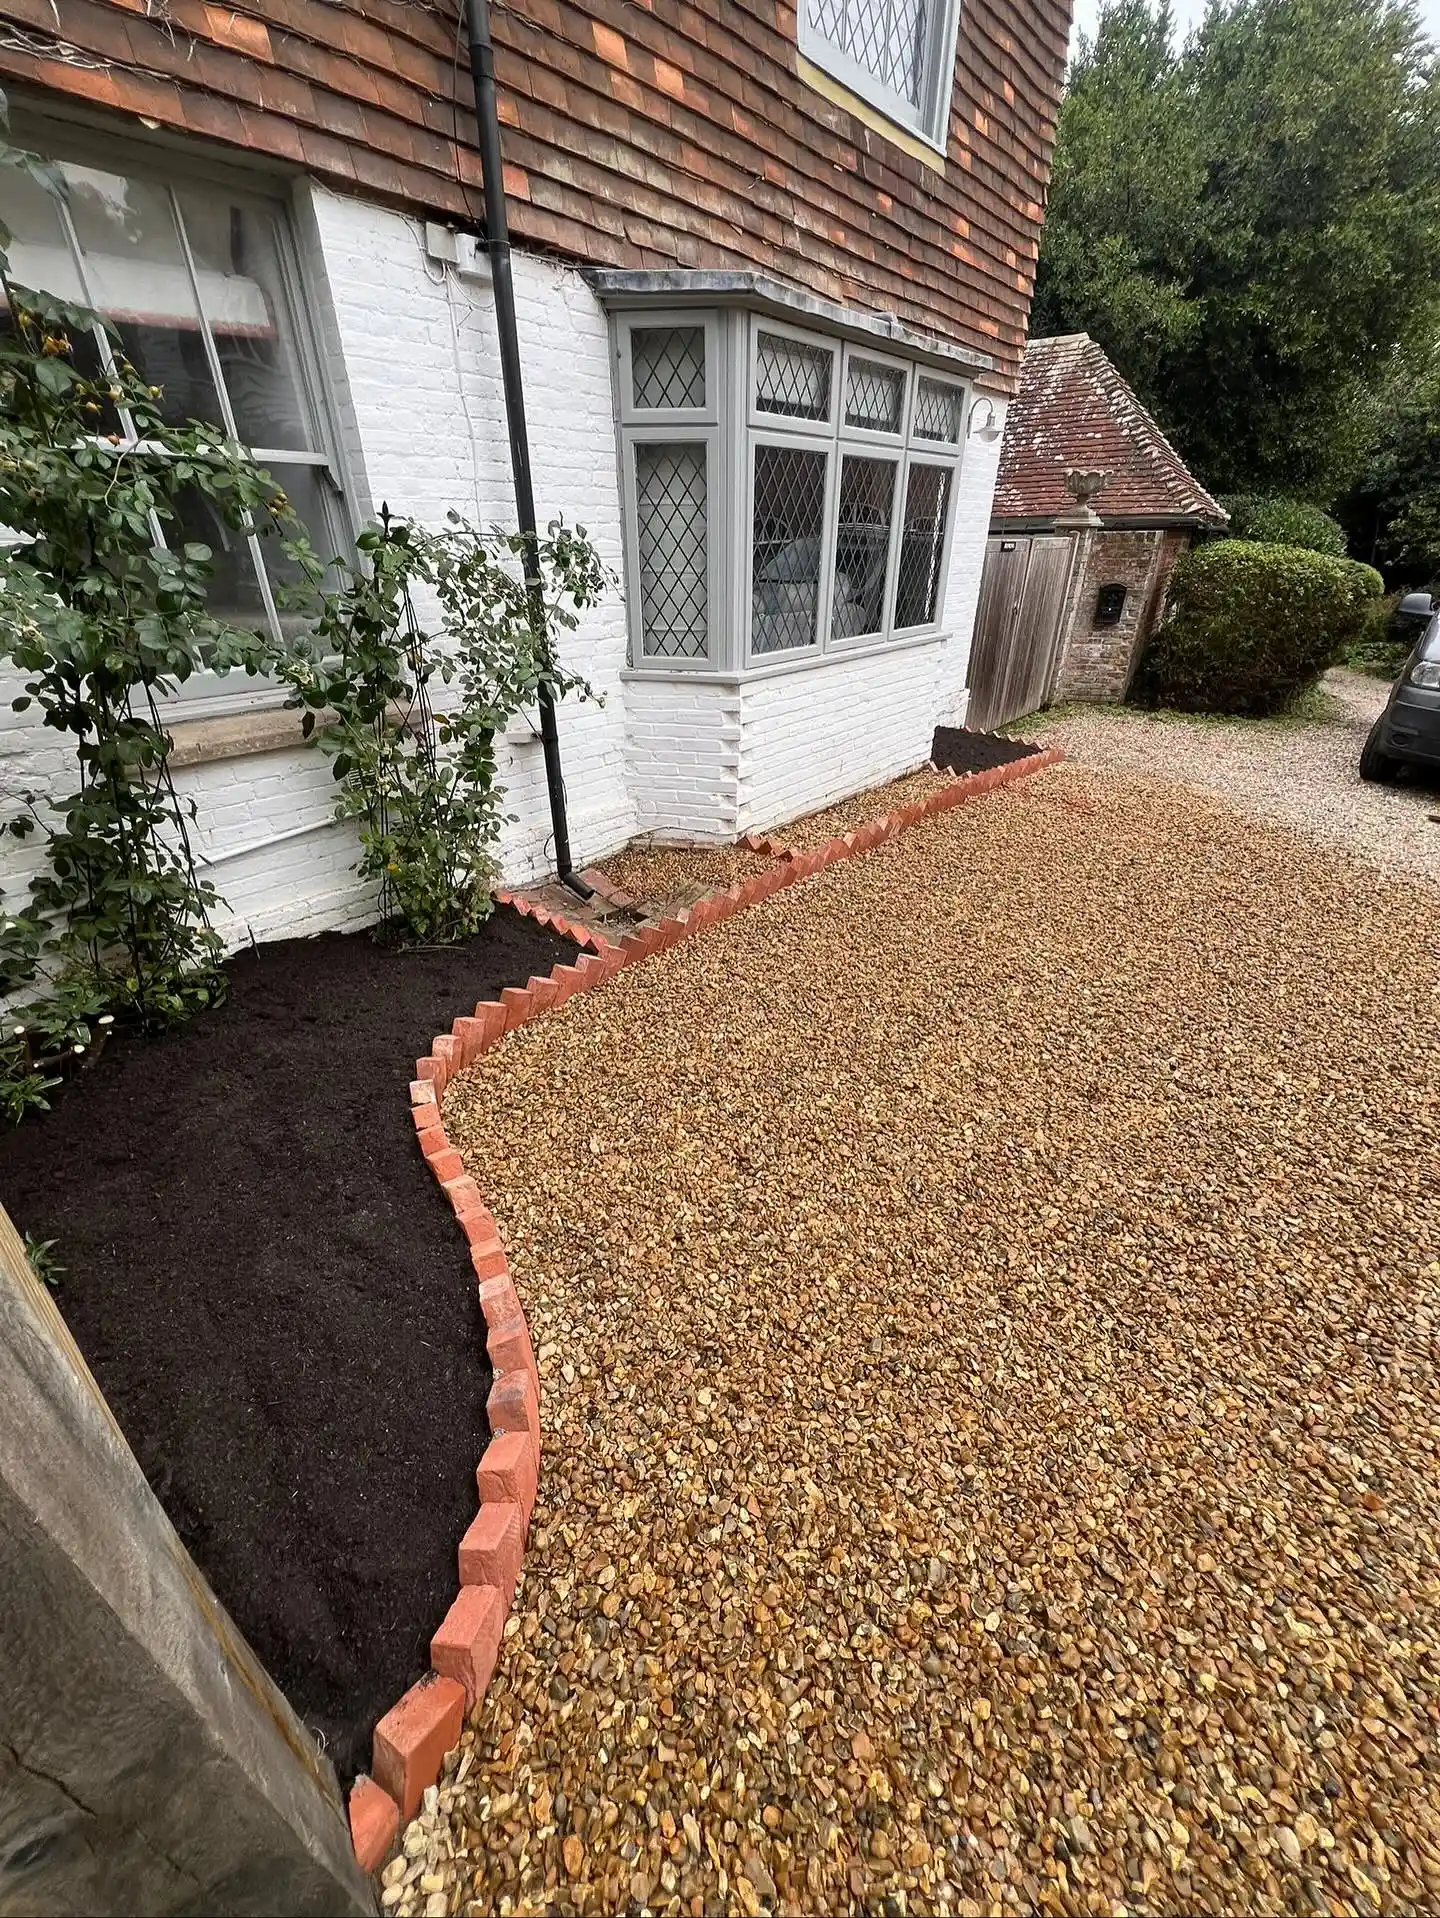
This curved red brick border separates a gravel driveway from a freshly prepared planting bed. Its gentle bends follow the side of the house and prevent the border from looking stiff. The raised bricks also help stop gravel from spreading into the soil when cars or people move nearby.
- Mark the curve first with a garden hose.
- Use shorter bricks or wider joints around tight bends.
- Compact the soil before adding the brick base.
- Angle the bricks slightly toward the planting bed.
- Keep the edge far enough from vehicle tires.
7. Raised Brick Garden Bed
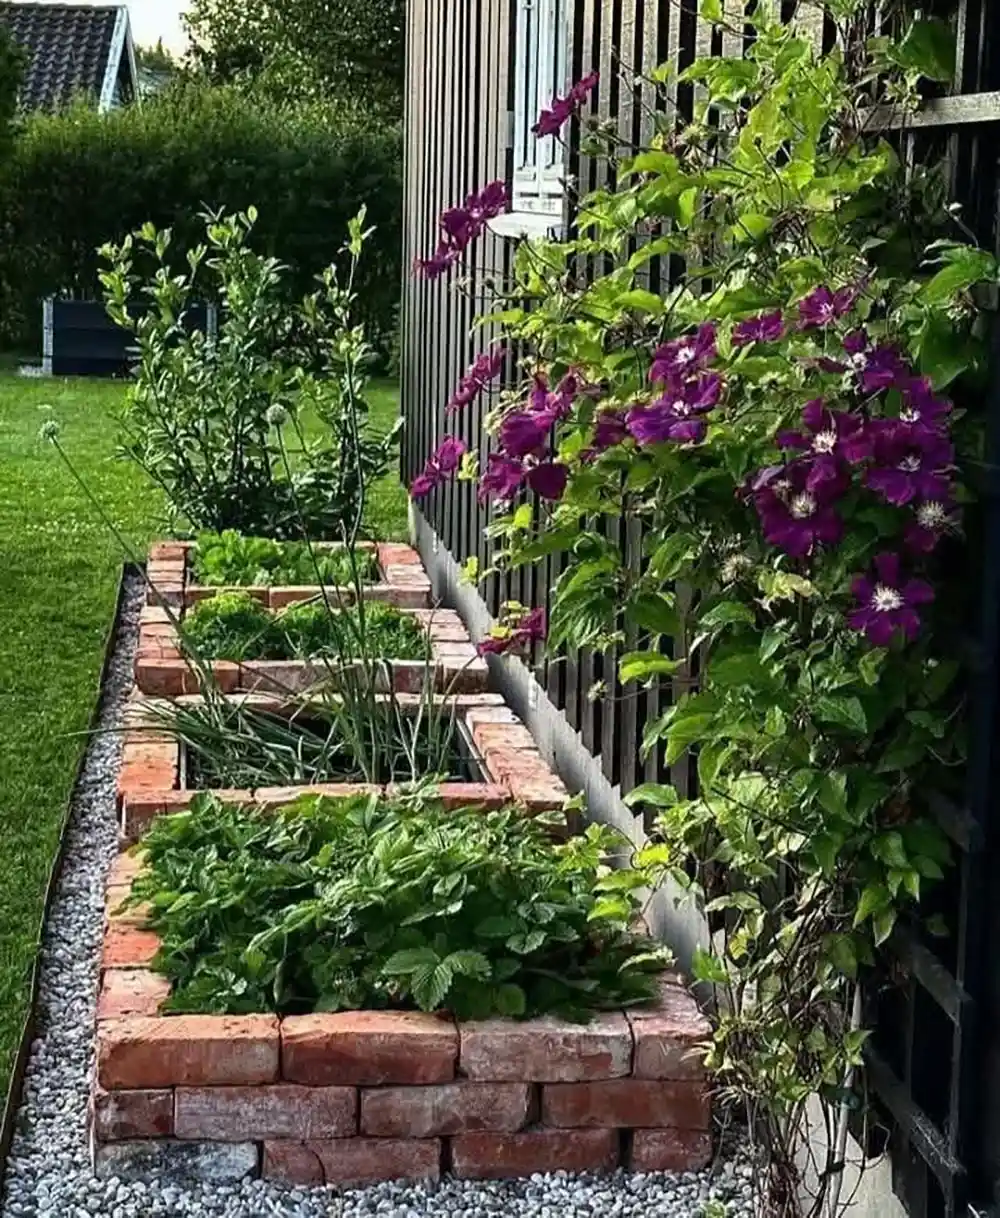
Stacked bricks form a shallow raised bed beside the fence, giving vegetables and flowers a defined growing space. Small brick dividers split the long bed into manageable sections. This is a practical brick edging idea when we want to organize plants while giving climbing varieties easy access to a trellis.
- Lay the first course on compacted and level ground.
- Stagger the brick joints for a stronger wall.
- Add cardboard underneath to slow existing weeds.
- Divide the bed according to each plant’s growing space.
- Keep moisture-sensitive fencing protected from damp soil.
8. Circular Tree Brick Edging
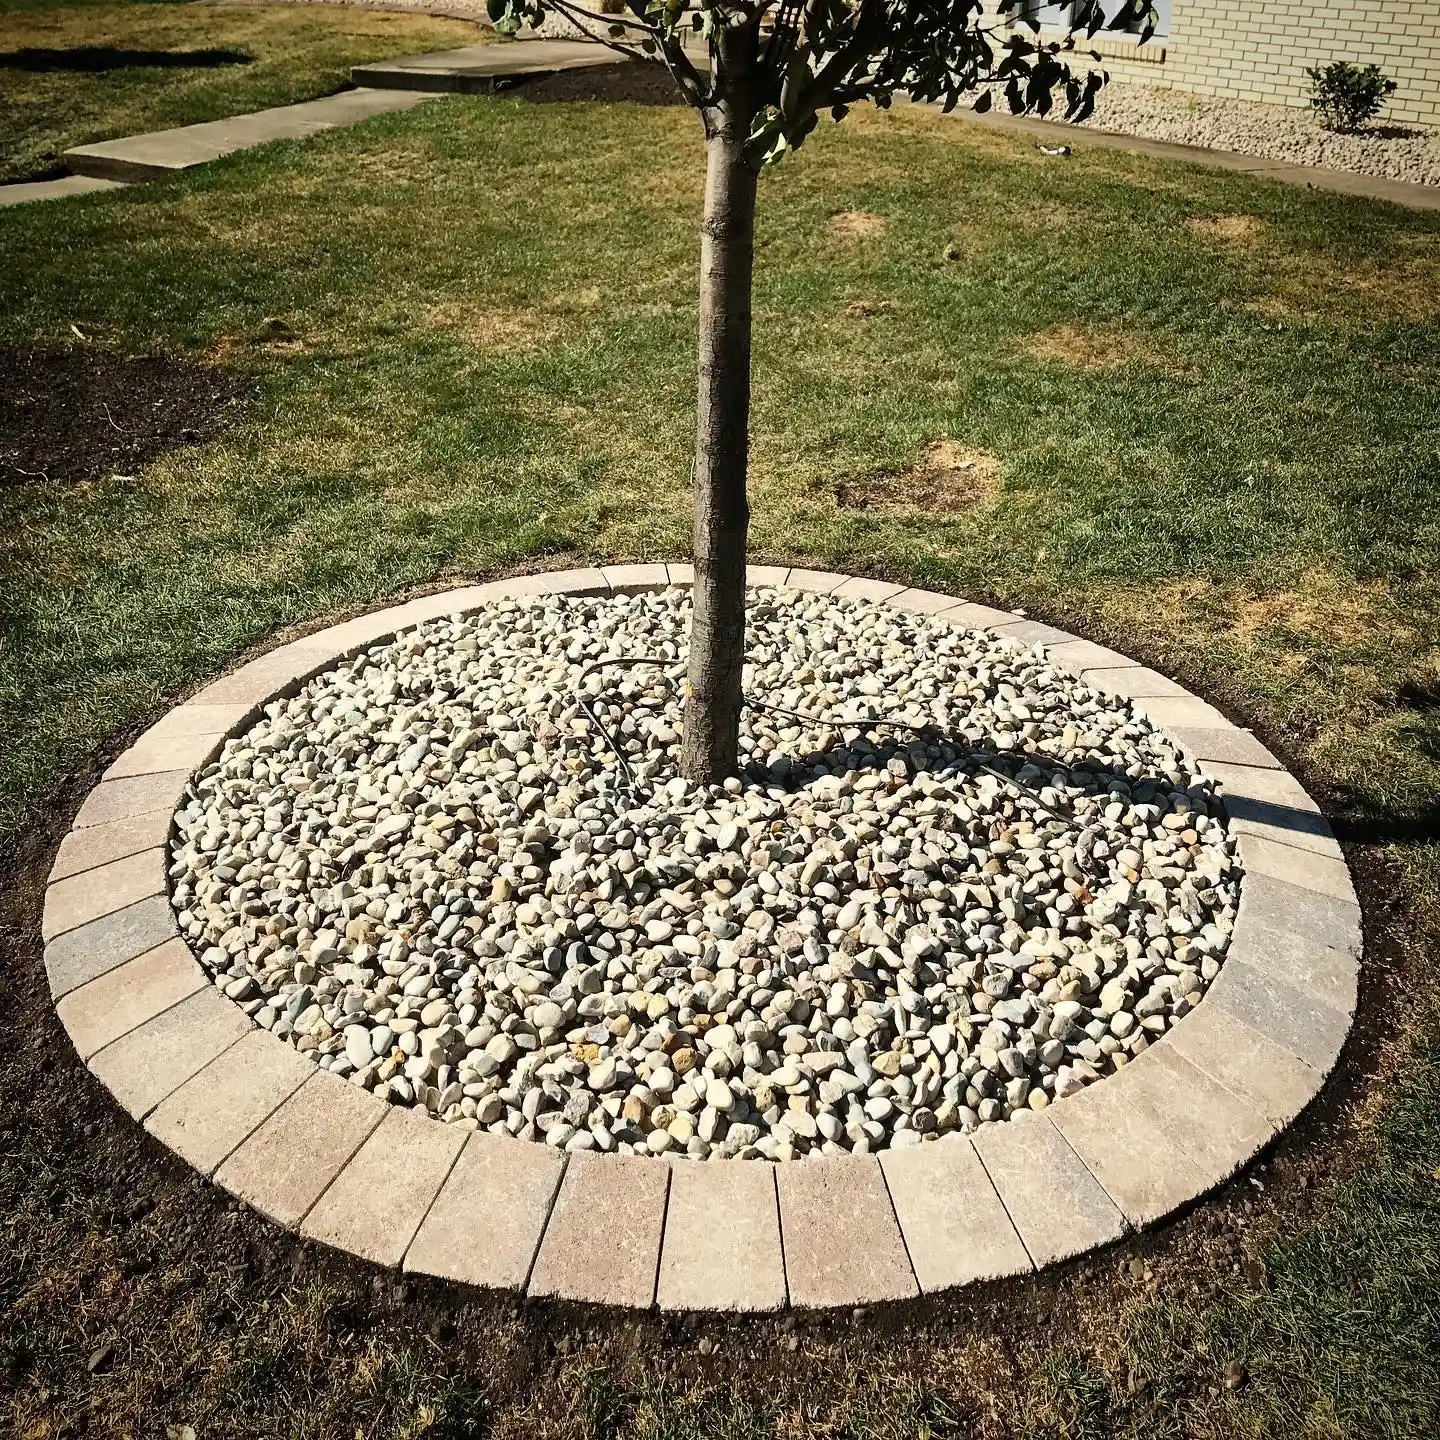
A round brick ring turns a young tree into a clear garden feature. Pale bricks frame the white decorative stones and create a smooth transition into the lawn. The wide circle leaves room around the trunk, but the stones should remain shallow so air and water can still reach the roots.
- Make the circle wide enough for future trunk growth.
- Keep bricks level to avoid creating a mowing obstacle.
- Do not pile gravel against the tree trunk.
- Place permeable fabric beneath the stones if needed.
- Check the ring yearly as surface roots begin to spread.
9. Curved Front-Yard Brick Edging
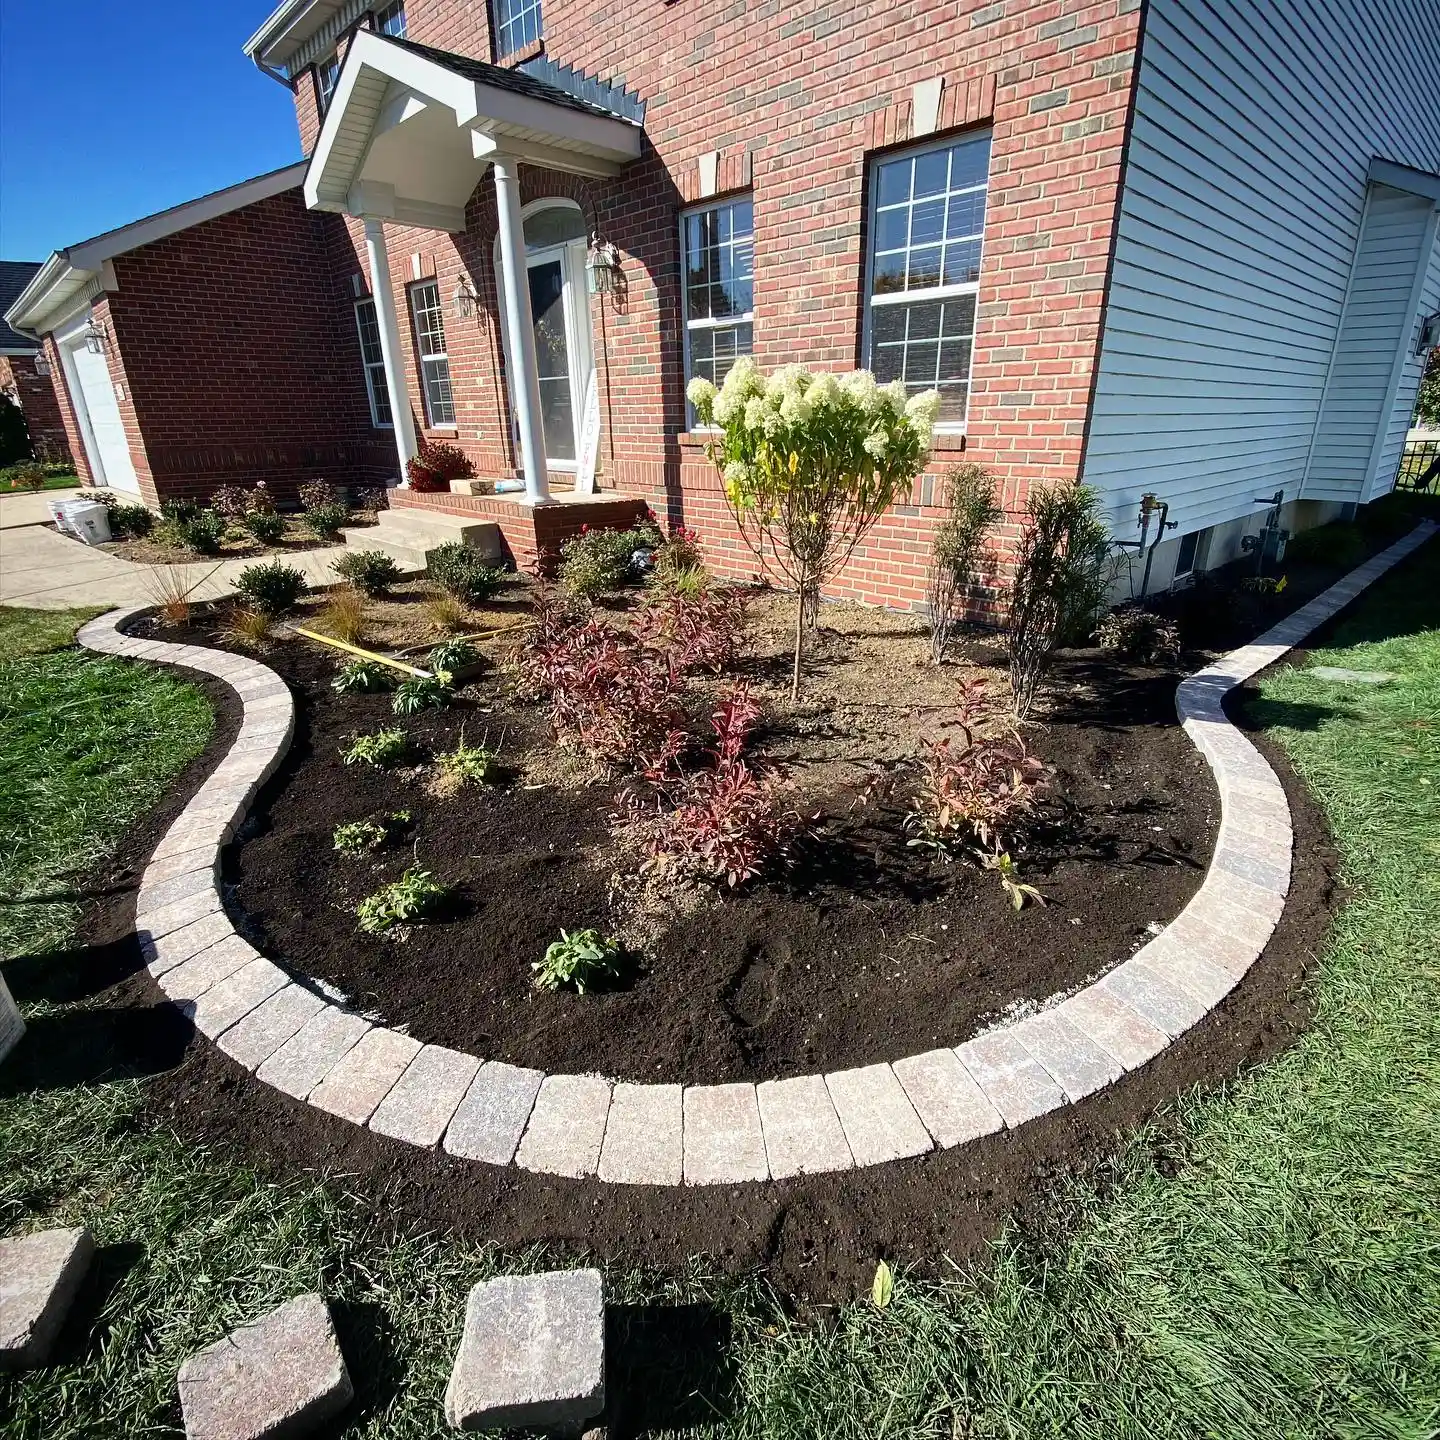
A sweeping pale-brick border gives this front garden bed a soft, flowing shape. The light brick works nicely with the house exterior and stands out against the dark mulch. Broad curves also make the lawn easier to mow than narrow corners, while leaving generous planting room around shrubs.
- Plan broad curves with a hose or marking paint.
- Remove the turf cleanly before digging the trench.
- Use matching bricks for a calm, finished appearance.
- Keep shrubs behind the edge at their mature width.
- Top up mulch without covering the brick faces.
10. Simple Red Brick Edging
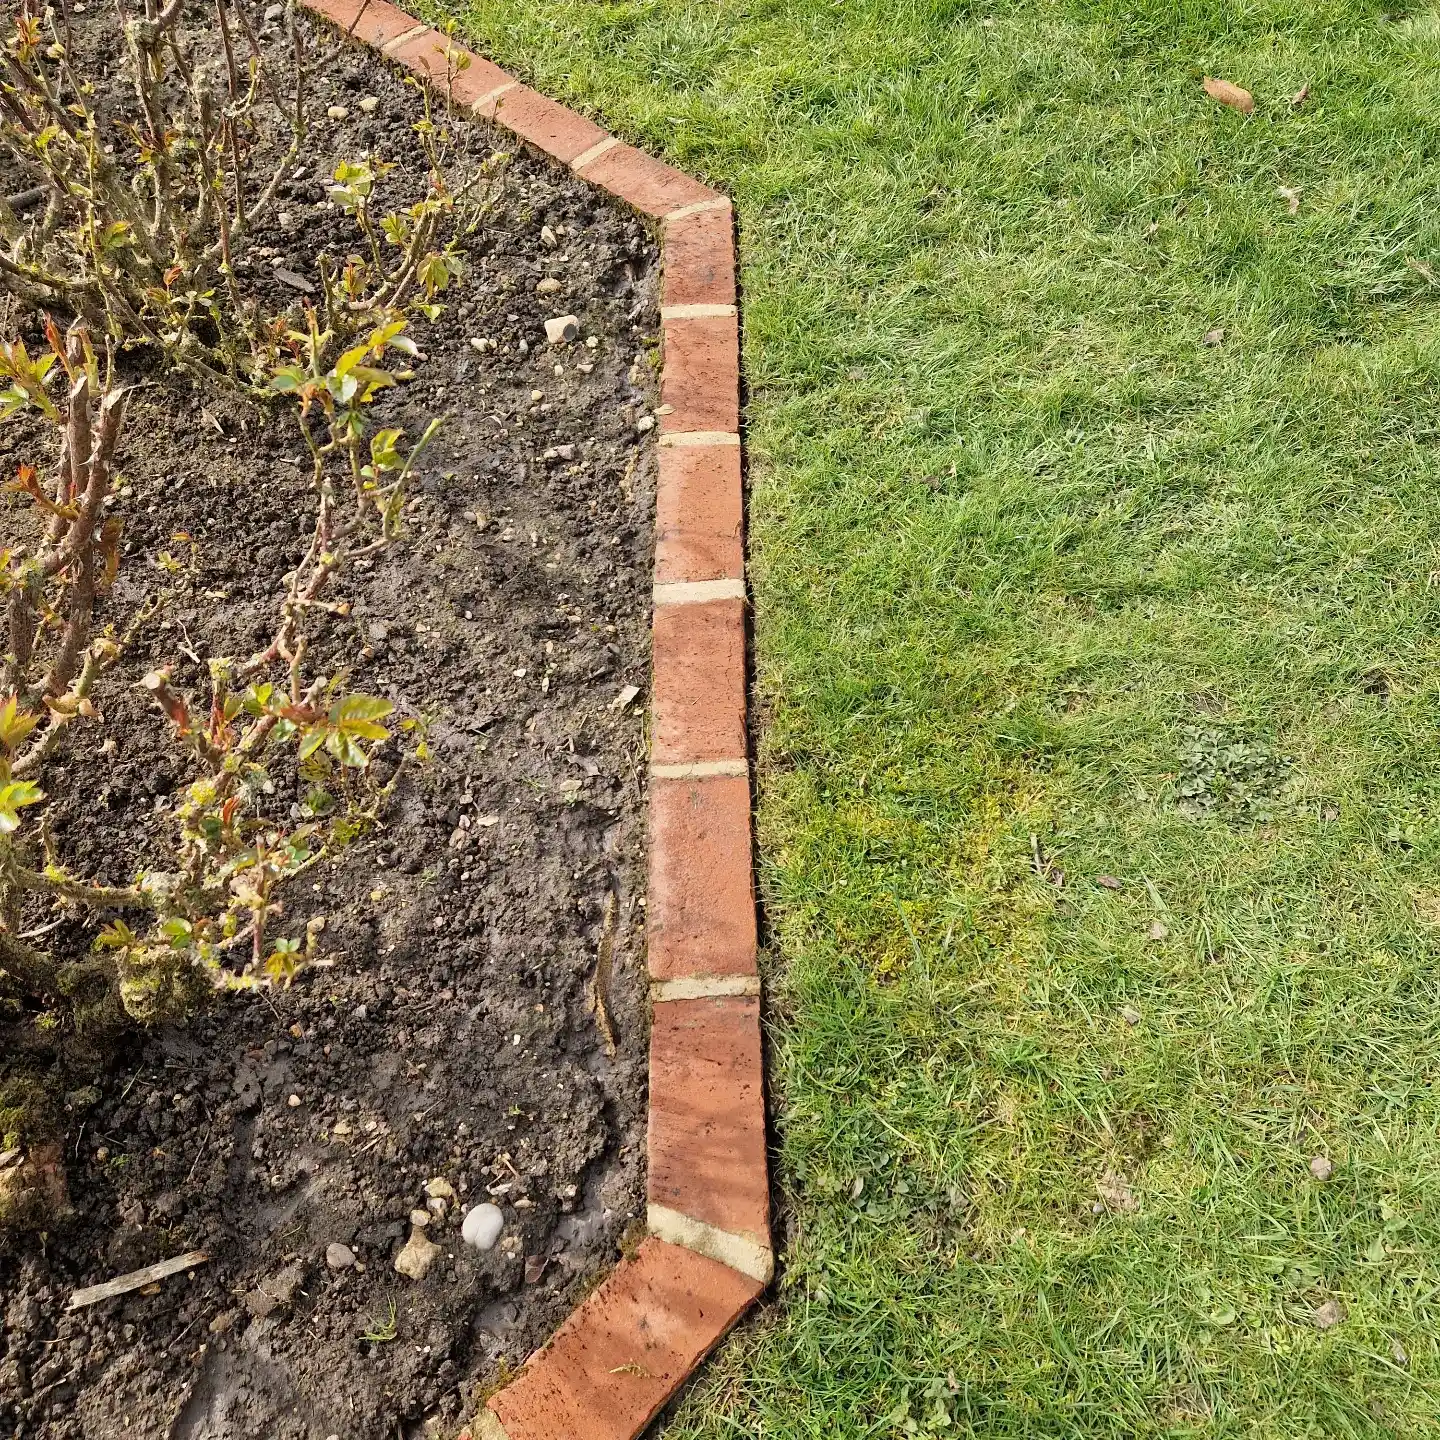
One flat row of red bricks is often all a garden bed needs. This border follows a straight line before turning at an angled corner, separating bare soil from the lawn. It is affordable, easy to repair, and suitable for gardeners who prefer a quiet edge rather than a decorative feature.
- Dry-lay the bricks before digging the full trench.
- Cut corner bricks for tighter, cleaner joints.
- Use a rubber mallet to adjust the height.
- Add landscape fabric only beneath the brick base.
- Remove grass runners before they cross into the bed.
11. Herringbone Brick Path Edging
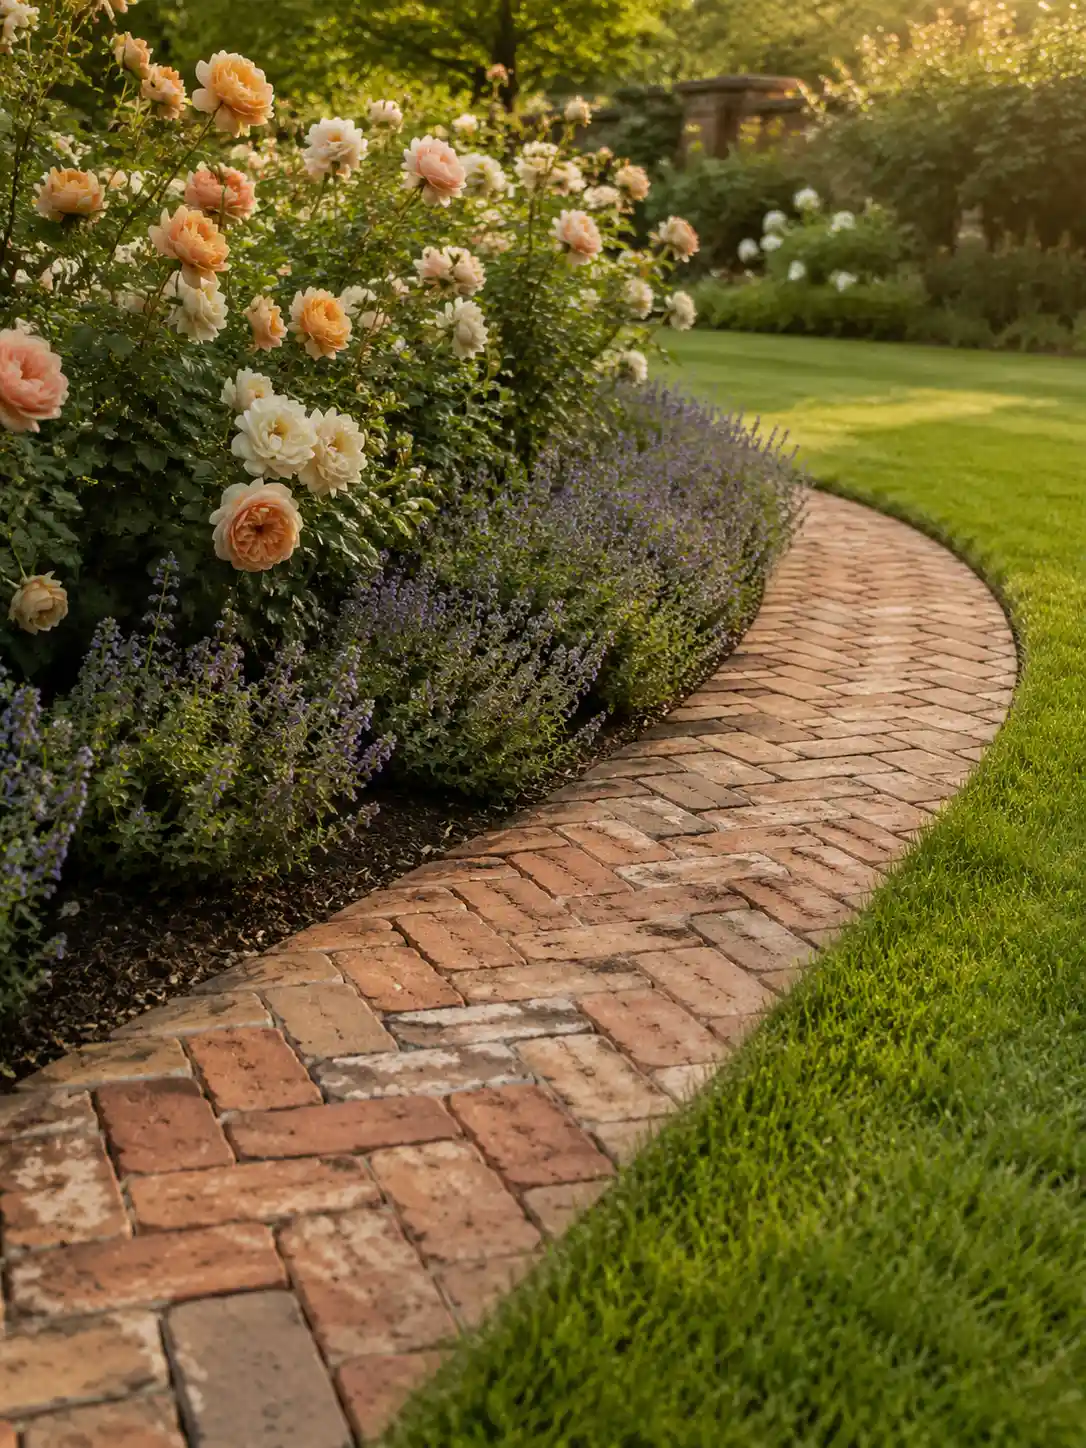
A wide herringbone brick path can work as both a walkway and a generous garden edge. Its warm, aged surface looks beautiful beside lavender, roses, and soft green lawn. The patterned brick adds far more character than a thin border and gives gardeners solid access to deeper flower beds.
- Install sturdy side restraints to hold the pattern together.
- Slope the path gently so rainwater can drain.
- Fill joints with fine sand after laying the bricks.
- Choose tumbled bricks for an older garden look.
- Make the walkway wide enough for comfortable maintenance.
12. Slanted Foundation Brick Edging
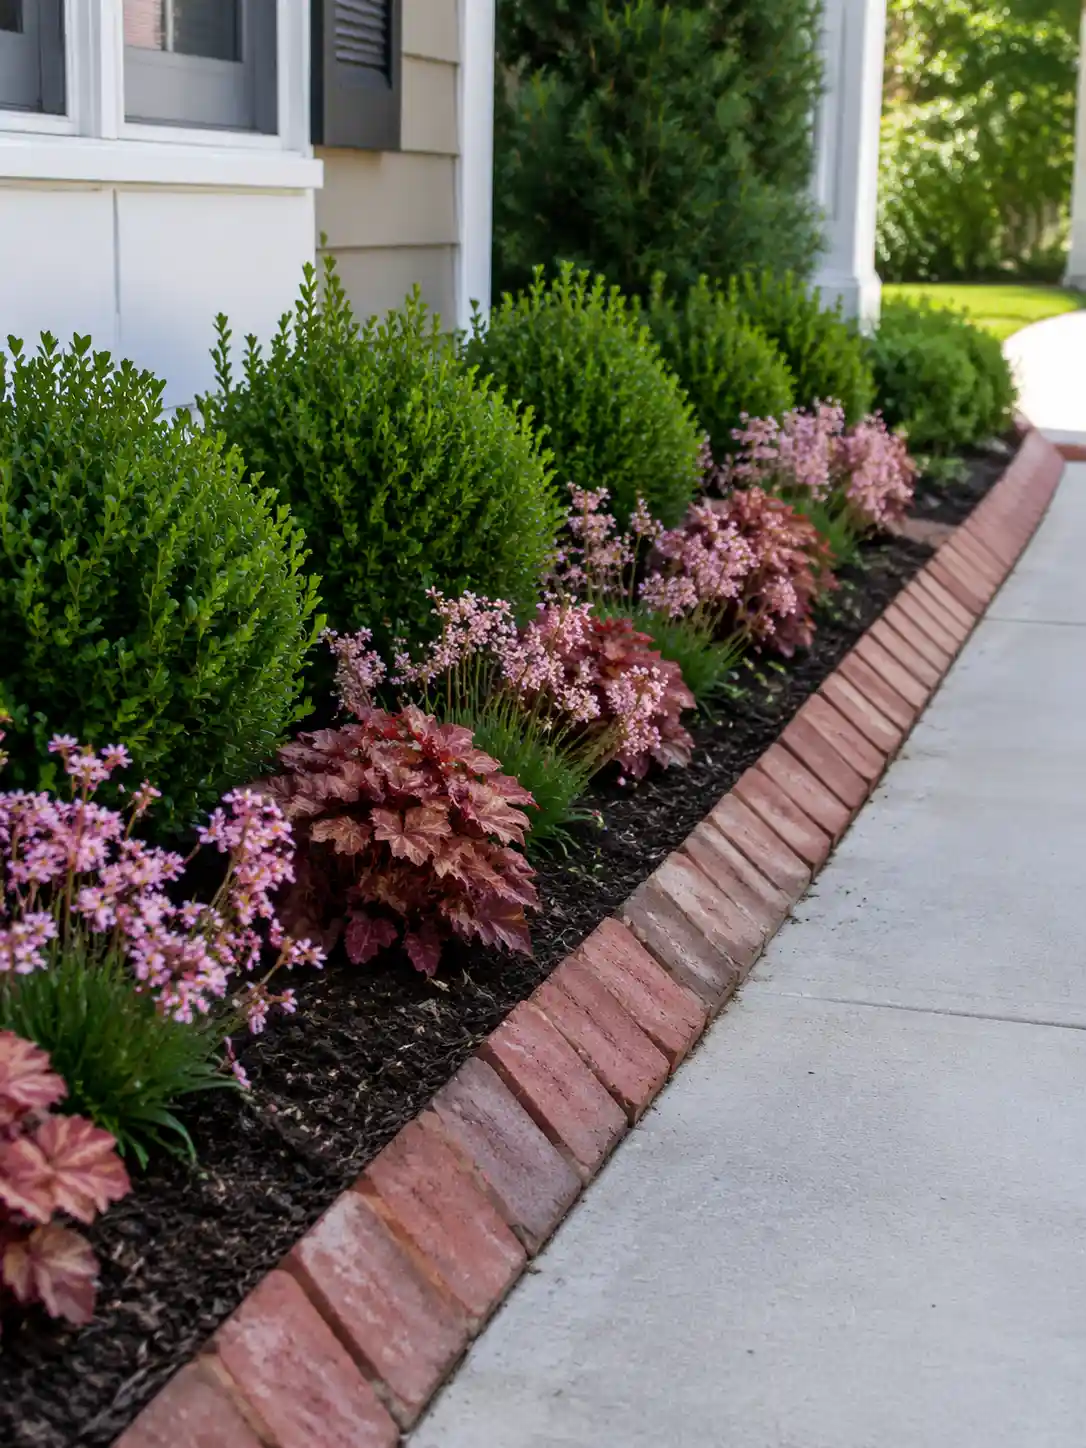
Bricks set at a slight angle create a raised border along this foundation planting bed. Their muted red finish brings warmth to the white house, clipped boxwoods, and pink foliage. The narrow border neatly separates dark mulch from the pale concrete path without taking up much valuable planting room.
- Maintain one angle across the entire border.
- Bury at least one-third of each brick for support.
- Leave drainage space beside the house foundation.
- Position plants so mature growth will not cover the edging.
- Brush mulch away from the adjoining concrete regularly.
13. Zigzag Brick Edging
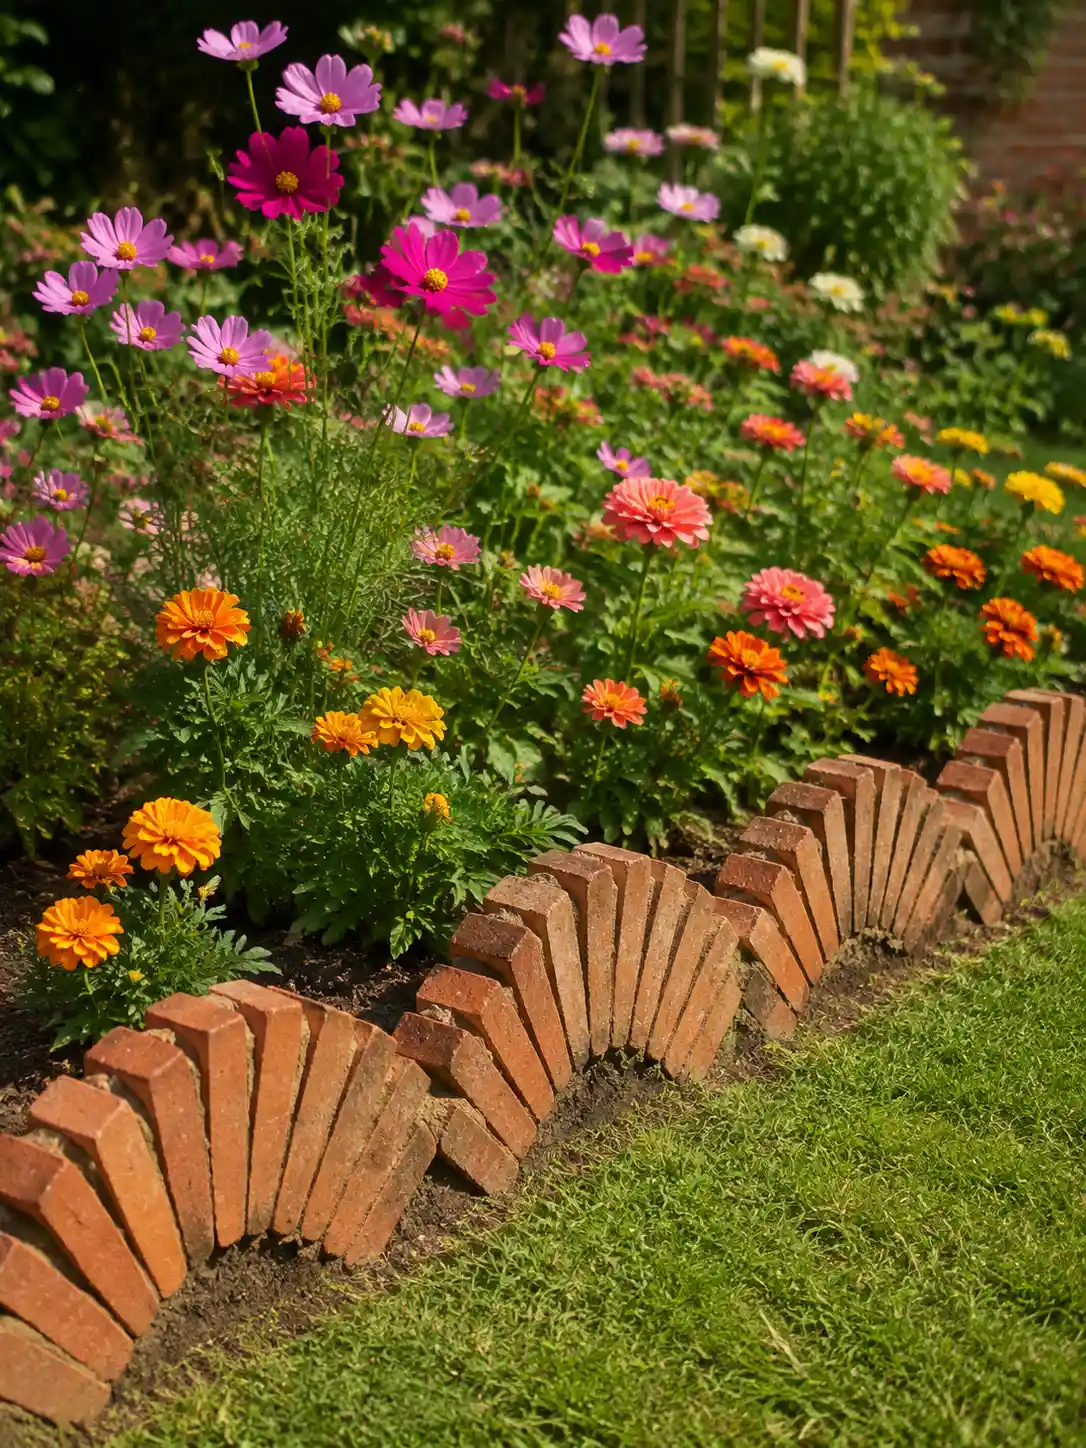
Upright bricks arranged in alternating angles create a bold zigzag border around this colorful flower bed. The pointed rhythm feels playful beside the loose mix of cosmos and marigolds. This brick edging idea suits informal cottage gardens where a perfectly straight, modern border might feel too controlled.
- Use bricks of similar size for a balanced pattern.
- Dig an even trench before setting the first brick.
- Check each angle against the previous brick.
- Bury the lower portion firmly to prevent leaning.
- Pair the pattern with informal flowers and dense planting.